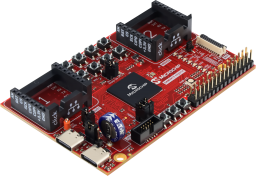
Configure and Build at91bootstrap for Application Debugging with the MPLAB® for VS Code® Extension
Purpose
The purpose of this tutorial is to
- To understand the role of at91bootstrap in the system boot sequence
- To configure at91bootstrap for debug support, enabling application loading via a debugger
- To gain experience in customizing bootloader settings such as memory initialization, clock setup, and boot source selection
- To build and generate a bootable binary image compatible with the target hardware
Overview
This tutorial focuses on configuring and building the at91bootstrap bootloader for a Microchip microprocessor platform that implements the Arm® architecture. at91bootstrap acts as the second-stage bootloader responsible for initializing essential hardware components and preparing the system to load and execute the main application.
In this tutorial, participants modify at91bootstrap configuration to support both debugging and execution of bare-metal or MPLAB® Harmony v3 applications flow.
Configure at91bootstrap to Debug an MPLAB Harmony v3 Application
Launch VS Code®.
Ensure kconfig for MPLAB extension v1.5.0 or higher is installed by following these steps:
- Open VS Code and navigate to the Extensions view (Ctrl + Shift + X)
- Search for Kconfig for MPLAB (Microchip official extension)
- Check the installed version:
- Ensure it is v1.5.0 or later
- If not installed:
- Click Install to add the extension
- Restart VS Code after install/update (recommended)


Clone at91bootstrap or download at91bootstrap from the "Second level bootloader for Microchip SoC (aka AT91)" GitHub® page.
Launch VS Code (File > Open Folder…) and select the at91bootstrap directory.
Wait about 2 minutes until a notification pops up at the bottom of VS Code asking you to import the project to MPLAB Extensions for VS Code. Click Yes to proceed.

Wait for the import to be completed. Verify the project loads in the VS Code Explorer and at91boostrap.mplab.json file is created. Then proceed to the next step.

There are a number of default settings file for different hardware configuration that are intended to give you a starting point when configuring at91bootstrap. Examples of differences in the configurations are:
- Boot media: SD/MMC vs QSPI vs NAND (driver + where it looks for the next image)
- Early hardware init: DDR timing/init, clocks, pinmux
- Console/UART selection (where you see logs)
- Debug behavior: whether it stops/waits so a debugger can attach vs immediately loading the next stage
The MPLAB Harmony v3 app debugging flow expects a bootstrap that:
- Initializes the board (especially DDR, clocks)
- Loads/starts your application image in the right place or jumps to your application DDR start address:
sam9x75_curiosity_bkptnone_defconfig (found under the configs folder in the at91bootstrap directory) is recommended for the SAM9X75 Curiosity debug flow used in these tutorials.
To load an existing at91bootstrap configuration in VS Code, first open the Command Palette by selecting View > Command Palette (or pressing Ctrl + Shift + P), then type and select MPLAB Kconfig Configure to launch the Kconfig view for the project.
Once the Kconfig interface opens, verify that the at91bootstrap project is selected, and then click the Load button at the top of the Kconfig window. In the file selection dialog, navigate to the at91bootstrap/configs directory, select sam9x75_curiosity_bkptone_defconfig, and click Open.

The various boot configurations can be seen as depicted in the accompanying image:

Now click Apply.
Click Yes on the pop-up so the selected configuration is correctly saved to the .config file in the at91bootstrap directory.
This completes the configuration of at91bootstrap for debugging an MPLAB Harmony v3 application.

To build at91bootstrap, follow these steps:
- Open Command Palette (Ctrl + Shift + P) from View > Command Palette and select Tasks: Run Task
- Choose the required task (e.g., clean and build - at91bootstrap (xc32)) from the list
- Then select Continue without scanning task output
- The task executes and shows build output in the terminal


The generated at91bootstrap.elf file under build/binaries/ can be used to debug an MPLAB Harmony v3 application.

Results
You have successfully:
- Configured at91bootstrap for debug-based application loading
- Generated the at91bootstrap binary image with required configuration
- Verified proper initialization of system components during boot