SAM-BA® GUI: Program at91bootstrap and MPLAB® Harmony v3 Binaries to NAND Flash
This section describes how to use the SAM-BA® GUI to program the at91bootstrap and MPLAB® Harmony v3 application binaries into the NAND Flash memory of a Microchip MPU.
Part 1: Program the Bootloader and Application Binary Into NAND Using SAM-BA GUI
Connect the USB cable J1 from your host PC needed for SAM-BA ISPP (ROM boot programming interface).
Power the board using USB Type-C® cable from your host through J14.

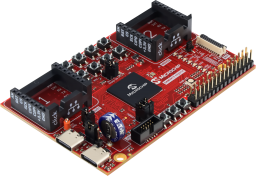
For SAM9X75 Curiosity Hybrid, channel C of the FT4232H is connected to UART.
Find the Channel C COM port number from Device Manager as follows:

To program the board via USB (in our case, COM port3):
- Select the connection type as Serial
- Select the board as sam9x75-curiosity
- Board/connection configuration:
- Click on the gear icon next to the board selection to connect to the board
Connect the board to a serial terminal for console output (115200 baud) via the FT4232H UART channel C.
In the SAM-BA GUI, to monitor serial commands, press the Reset button on the board and observe RomBoot getting printed on the console.

Open NAND boot jumper J9.
Press the Reset button and observe RomBOOT message printed on the console.
Close the NAND boot jumper J9 to enable NAND Chip Select.
Program at91bootstrap.bin and harmony.bin using SAM-BA GUI.
Download the pre-built binaries, harmony.bin and at91bootstrap.bin.
Erase NAND flash:
- From SAM-BA GUI, ensure Applet: NAND Flash is selected from the left navigation menu and Command: Erase is selected under Select Command.
- Then execute. This will erase NAND flash.

Flash at91bootstrap.bin:
- From SAM-BA GUI, make sure Applet: NAND Flash is selected from the left navigation menu and Command: writeboot is selected under Select Command.
- Then select the corresponding at91bootstrap.bin and execute. This will flash at91bootstrap.bin.

Flash harmony.bin:
- From SAM-BA GUI, make sure Applet: NAND Flash is selected from the left navigation menu and Command: write is selected under Select Command.
- Choose the address as 0x40000.

- Then select the corresponding harmony.bin and execute. This will flash harmony.bin.
This completes flashing NAND with the required boot and application binaries.
Part 2: Boot from NAND and Verify Output on the Serial Console
Press Reset on the board.
Confirm in the serial console that the ROM code loads from NAND and that at91bootstrap starts and launches the MPLAB Harmony v3 application (expected console banner/output and application behavior, such as LED behavior).
The sample application and console messages are shown in the accompanying images:


Results
You successfully programmed both the bootloader and the MPLAB Harmony v3 application into NAND using SAM‑BA GUI. You verified correct system startup by confirming the complete boot sequence from Boot ROM to at91bootstrap and finally to the MPLAB Harmony v3 application, as observed through serial console output and expected application behavior.